haguc
New Member
- Joined
- Apr 22, 2009
- Messages
- 299
Hello everyone, I've been a lurker for quite some time and after reading some of your threads decided to do a project myself. I currently run a coolerdor and decided it is time to upgrade to a larger humidor that had some display capacity. I know that this project is not nearly up to the high end standards that some of the other humidors have been built using, but I wanted to have something that looked nice and most importantly worked. So, this is my project. I have an area above a bar that has a utility room behind it. I am building a humidor 14.25" wide to fit between the wall studs. It is inset and I have area behind it. So, I can hide my psu and other necessities in the utility room. This means that the exterior of the unit doesn't have to be fancy or look pretty, I can do whatever I need to it in order to make it function properly. This is where it is going to be:
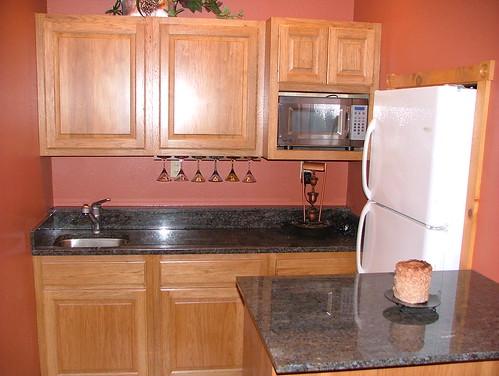
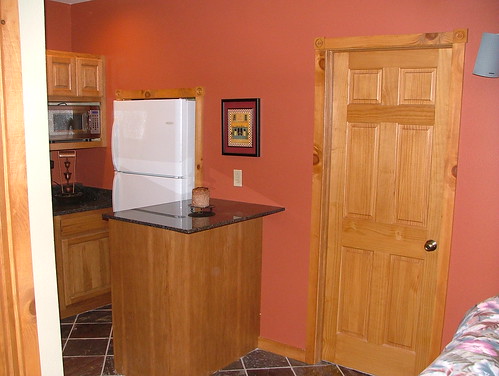
In this image it will be located right where the the picture is on the wall above the candle. I will move the outlet to the other side of the stud
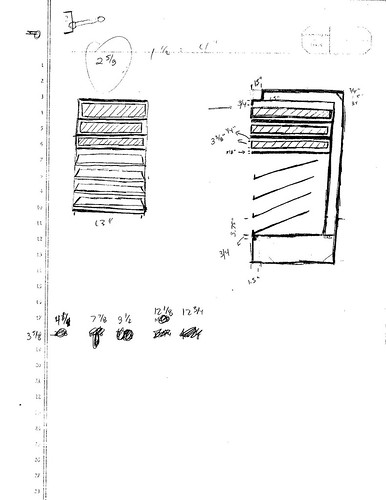
Also, I have attached some pictures of my initial design. This is my first draft of the drawing

This is the second cleaned up draft:
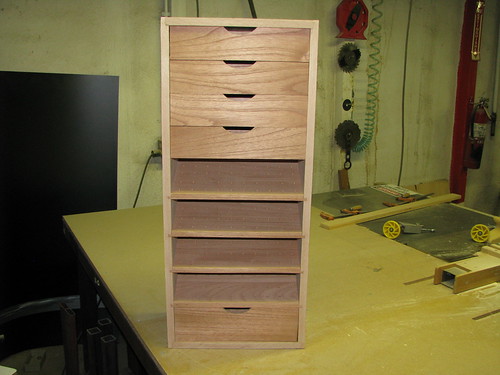
My design changed a good bit after I actually looked at the wall area behind and decided I couldn't make it as deep as I wanted, I do not currently have a drawing of what it will be, but the biggest things that changed are the following: Deleted rear air channel, made 4 drawers instead of 3 drawers.
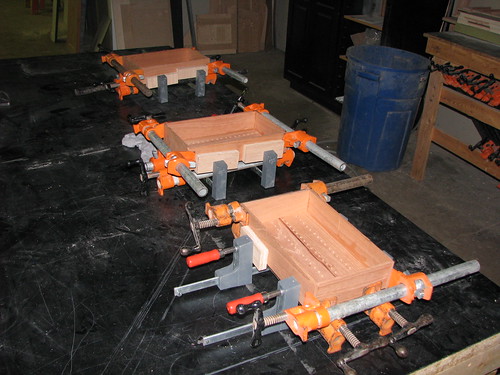
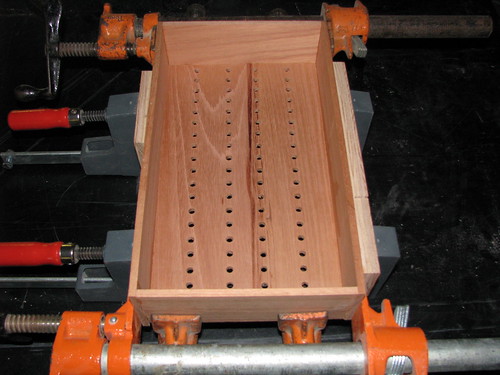
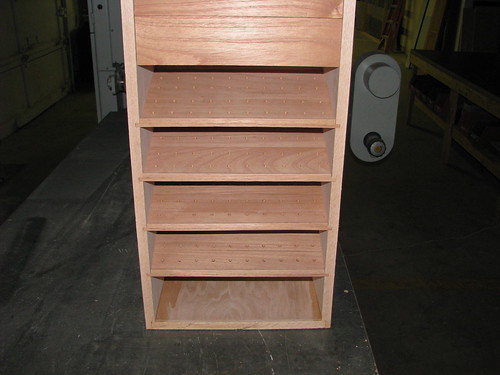
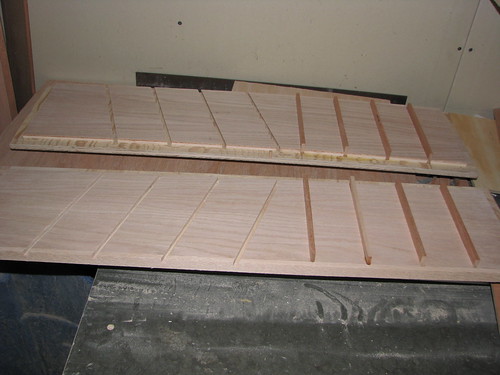
I have a friend that works in cabinets but hasn't really done much with humidors, he has helped me a good bit, but I have done most of the work myself. I haven't ever done woodworking, but thought it would be fun to try. I am also trying to keep the project on a budget. This is my progress shots of what I have so far. I actually had it dry fitted, but took it apart for the night and didn't get a chance to get a picture of it together. For the construction I am doing 3/4" oak plywood on the outside of the unit for all the panels. I was not planning on doing a full interior lining of spanish cedar, trying to keep it on a budget for now. If I wanted to add cedar to the side panels later I could add it easily, but I want to make sure the thing works before I put too much money into it..... this is my first cabinet ever. The shelves and drawers will be spanish cedar, so everything in direct contact with the cigars will be cedar. Here we go:
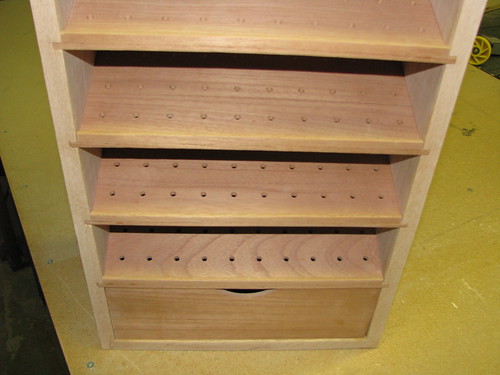
The shelves will not go all the way to the back of the cabinet, so that should allow some air movement. I didn't do a full "crate" but put some holes in the shelves to allow for air as well.
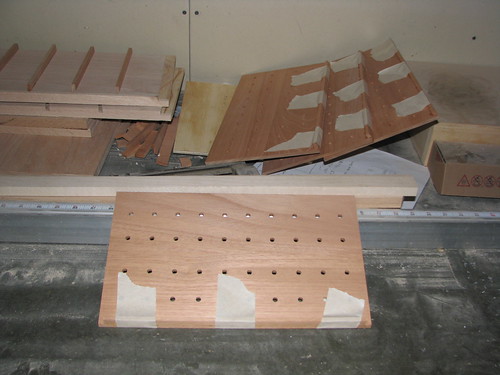
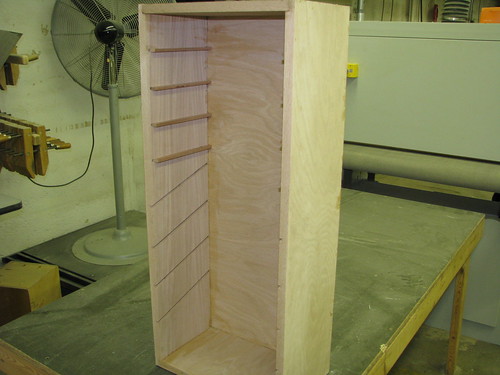
I think I am going to leave the shelves removable so that they can slide out.. can make the cabinet useful for other things later if someone doesn't want a humidor. There are grooves routed for the shelves on both end panels.
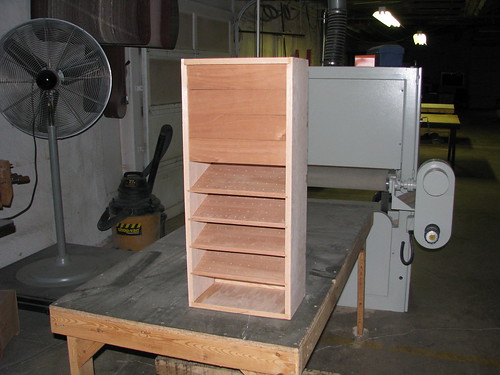
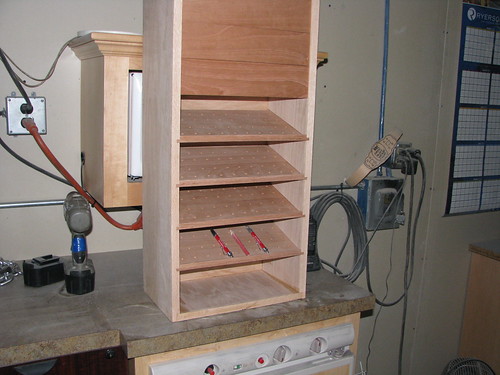
This is a view with a shelf and top panel stuck in place.. gives an idea of what it will be:

So.... here are my questions:
1.) Should I do anything special on the INSIDE of the box to help seal the plywood. I was thinking of staining the surfaces and then using a waterproof sealer gloss coat (I apologize for my lack of knowledge on teh proper terms) If I do this method, how long should I wait for it to completely air out?
2.) I could leave the oak natural and completely seal the oustide of the box with something. Is this a better alternative. As stated, it will be built inthe wall so the finish work on the sides doesn't matter, I can do anything to it.
3.) What sort of hinge should I get and use. I was thinking of doing a normal cabinet hinge that is surface mountd and then using a weather seal all the way around the door. The surface mounted hinge should give me a uniform gap around the outside for the weatherstripping to work properly.
4.) What sort of latch do I need on the door? I assume it would need to hold it tight to the weatherstripping if I went this direction?
That is where I am at right now, just trying to figure out what the next thing I should do is so that the unit will work properly. Thanks in advance for the help and critiques, I am doing this for fun and to learn so don't be afraid to critique.
In this image it will be located right where the the picture is on the wall above the candle. I will move the outlet to the other side of the stud
Also, I have attached some pictures of my initial design. This is my first draft of the drawing
This is the second cleaned up draft:
My design changed a good bit after I actually looked at the wall area behind and decided I couldn't make it as deep as I wanted, I do not currently have a drawing of what it will be, but the biggest things that changed are the following: Deleted rear air channel, made 4 drawers instead of 3 drawers.
I have a friend that works in cabinets but hasn't really done much with humidors, he has helped me a good bit, but I have done most of the work myself. I haven't ever done woodworking, but thought it would be fun to try. I am also trying to keep the project on a budget. This is my progress shots of what I have so far. I actually had it dry fitted, but took it apart for the night and didn't get a chance to get a picture of it together. For the construction I am doing 3/4" oak plywood on the outside of the unit for all the panels. I was not planning on doing a full interior lining of spanish cedar, trying to keep it on a budget for now. If I wanted to add cedar to the side panels later I could add it easily, but I want to make sure the thing works before I put too much money into it..... this is my first cabinet ever. The shelves and drawers will be spanish cedar, so everything in direct contact with the cigars will be cedar. Here we go:
The shelves will not go all the way to the back of the cabinet, so that should allow some air movement. I didn't do a full "crate" but put some holes in the shelves to allow for air as well.
I think I am going to leave the shelves removable so that they can slide out.. can make the cabinet useful for other things later if someone doesn't want a humidor. There are grooves routed for the shelves on both end panels.
This is a view with a shelf and top panel stuck in place.. gives an idea of what it will be:
So.... here are my questions:
1.) Should I do anything special on the INSIDE of the box to help seal the plywood. I was thinking of staining the surfaces and then using a waterproof sealer gloss coat (I apologize for my lack of knowledge on teh proper terms) If I do this method, how long should I wait for it to completely air out?
2.) I could leave the oak natural and completely seal the oustide of the box with something. Is this a better alternative. As stated, it will be built inthe wall so the finish work on the sides doesn't matter, I can do anything to it.
3.) What sort of hinge should I get and use. I was thinking of doing a normal cabinet hinge that is surface mountd and then using a weather seal all the way around the door. The surface mounted hinge should give me a uniform gap around the outside for the weatherstripping to work properly.
4.) What sort of latch do I need on the door? I assume it would need to hold it tight to the weatherstripping if I went this direction?
That is where I am at right now, just trying to figure out what the next thing I should do is so that the unit will work properly. Thanks in advance for the help and critiques, I am doing this for fun and to learn so don't be afraid to critique.