-
Hi Guest - Come check out all of the new CP Merch Shop! Now you can support CigarPass buy purchasing hats, apparel, and more...
Click here to visit! here...

Search results
-
S
Converting Foam Humidifier to a Beads Humidifier
I couldn't easily find a tutorial for converting foam humidifiers that you get with a humidor into bead humidifiers when I searched CP, so I decided I'd post a little tutorial on how I did it. I know many of your probably don't need this tutorial, but somebody like me might be able to use it...- Setren
- Thread
- Replies: 15
- Forum: Cigar Storage
-
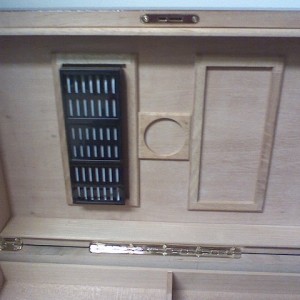
Humidifier Conversion Done
This is my first humidifier done and set in my humidor.- Setren
- Media item
- Comments: 0
- Album: Converting Foam to Beads
-
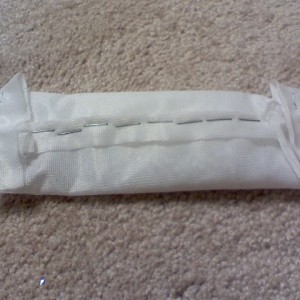
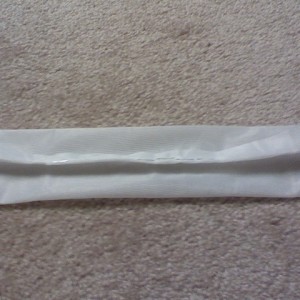
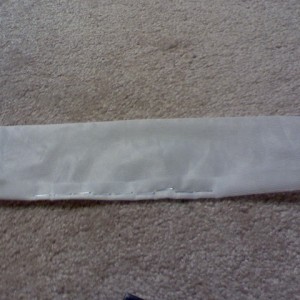
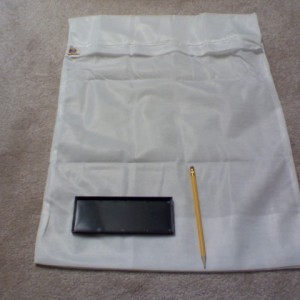
Completed Bag
The bag is now complete.- Setren
- Media item
- Comments: 0
- Album: Converting Foam to Beads
-
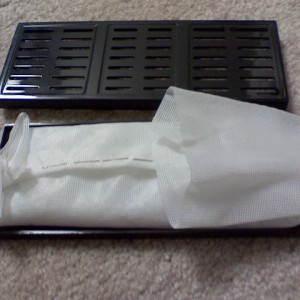
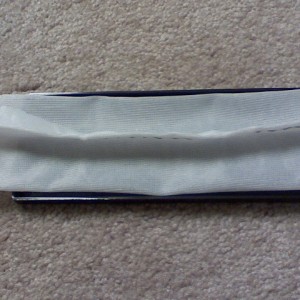
Fitting the Beads and Bag into the Humidifier
Pat the bag to spread the beads out evenly. Make sure you don't put too many or too few beads into the bag.- Setren
- Media item
- Comments: 0
- Album: Converting Foam to Beads
-
Opened Bag
Open up your bag and get ready to pour in your beads.- Setren
- Media item
- Comments: 0
- Album: Converting Foam to Beads
-
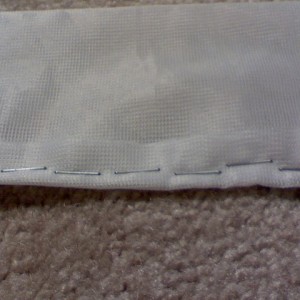
Second Staple Set
The bag has now been stapled again.- Setren
- Media item
- Comments: 0
- Album: Converting Foam to Beads
-
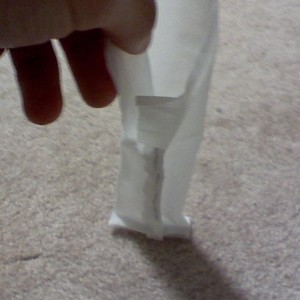
Fold before Second Staple Set
Take some of the excess on the sides and fold it over.- Setren
- Media item
- Comments: 0
- Album: Converting Foam to Beads
-
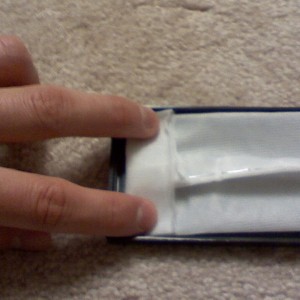
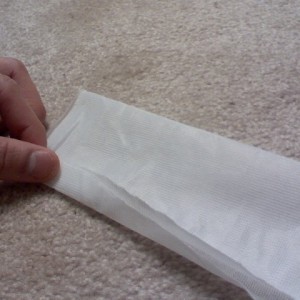
Adjusting the Bag in the Humidifier.
Adjust your bag so that fits correctly in your humidifier.- Setren
- Media item
- Comments: 0
- Album: Converting Foam to Beads
-
Adjusting Bag after First Staple Set
Adjust your bag so that the staple line is in the center.- Setren
- Media item
- Comments: 0
- Album: Converting Foam to Beads
-
First Staple Set Close-up
Here's a close-up of the staple line. As you can see, you don't have to be perfect.- Setren
- Media item
- Comments: 0
- Album: Converting Foam to Beads
-
First Set of Staples
Leave a few inches open on each end. Also, only staple a line as long as your humidifier.- Setren
- Media item
- Comments: 0
- Album: Converting Foam to Beads
-
Initial Bag Fold
So here's how you fold your bag initially. Fold it in half. Then take the two free ends and fold it bag a bit.- Setren
- Media item
- Comments: 0
- Album: Converting Foam to Beads
-
Cut Rectangle
Here's the cut bag and part of the plastic humidifier.- Setren
- Media item
- Comments: 0
- Album: Converting Foam to Beads
-
Marking the Rectangle
Here I'm marking out the rectangle I want to cut out. Make the rectangle about three times as wide and one and one half times as long as the humidifier. Mark lightly so the graphite won't stick to the bag later.- Setren
- Media item
- Comments: 0
- Album: Converting Foam to Beads
-
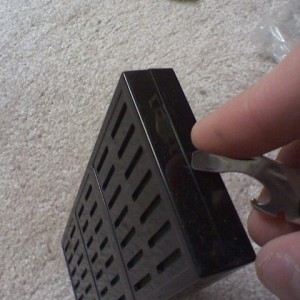
Cracking Open the Humidifier
I used a Swiss Army type flat-head screwdriver and ran it along the long side of the humidifier in order to get it between the two pieces of plastic. I then lightly pulled the two pieces apart near the corner between a long and short edge. Yeah, the picture doesn't actually portray what I did.- Setren
- Media item
- Comments: 0
- Album: Converting Foam to Beads
-
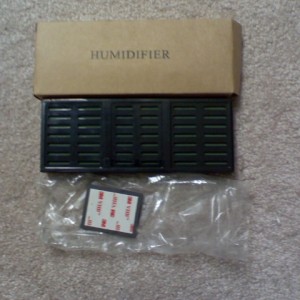
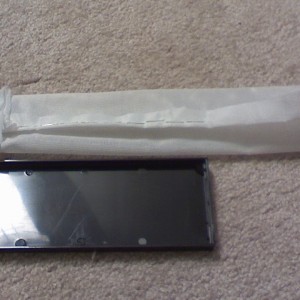
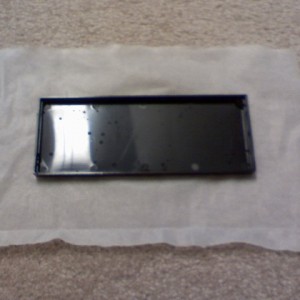
New Foam Humidifier
So here's the box and bag in which the humidifier and the mounting metal/magnet came.- Setren
- Media item
- Comments: 0
- Album: Converting Foam to Beads
-
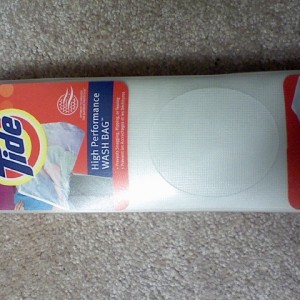
Tide Fine Wash Bag
While shopping at Target, I ran across this Tide bag. It has fine holes in it so as to allow water through, but the holes are small enough to keep beads in. I'm sure any wash bag would work so long as the holes aren't big enough to allow beads through.- Setren
- Media item
- Comments: 0
- Album: Converting Foam to Beads
-
S
New Humidor
Yeah, that's what I've read about many people's imperfects. Guess I'm the 1 in 100 that gets one that's actually beat up. :'( I've got some nice smokes that I got from a newbie sample trade and some other ones. Let's see, two Opus X, an Anejo, and some other ones. :D I got 20 Cu-Avano's that...- Setren
- Post #7
- Forum: Cigar Storage
-
S
New Humidor
Yeah, I think in the future I'll just pay the extra 20 dollars. This will be fine, though, especially because I'll be moving around a lot soon, and this humidor's bound to get a bit beat up anyways.- Setren
- Post #3
- Forum: Cigar Storage
-
S
New Humidor
Well, I got my new humidor from CheapHumidors today. It's a Ravello imperfect. It's a bit beat up, but after tinkering with it a bit, I think I can live with it. The obvious imperfections are the dent on the edge of the top and banged up corners in the back. The other imperfections are...- Setren
- Thread
- Replies: 16
- Forum: Cigar Storage