Aalvord2
Well-Known Member
Wine Cooler Conversion


This is what I started with. It’s and edge star wine cooler I found on market place. The guy said it wouldn’t cool. Claimed he had an appliance repairman come out to evaluate the unit. He said that the compressor shit the bed. Turns out I know a guy who deals with heating and cooling on a regular basis. For the whopping price of $150 I loaded it up and took it home. The compressor worked fine, the lack of refrigerant in the system was an issue. It appeared a four legged animal nibbled on the service line of the compressor at some point.
I kept the compressor and evaporator hooked up, because for some reason my mind operates in the manner of “better to have and not need, than need and not have”. I also kept the defrost attached in case I ever decide to run heat in the unit.
It goes with out saying there’s probably a thousand different ways to go about this. If you haven’t noticed yet, I have the tendency to get hyper focused on a hobby once I get started.


I started by pulling the center divider out of the unit. It’s a perfect place to hide wiring and controls. I cut two vents on the bottom side of the center divider to allow air to move from the bottom section.


I spliced into the existing 110V incoming power and wired it up the the humidity controller. I then ran the 110v coming out of the controller to a 12V step down transformer. Then the outgoing 12V from the transformer to the terminal block for the fans and lights.


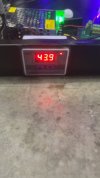
I added the UV strip lights with the intention of using the UV Lights ability to kill bacteria. I’m hoping this will keep any mold from being able to survive. They come on anytime the fans get a call from the humidity control. I also kept the factory temperature display in the top of the unit. I wasn’t sure if it would still operate properly when everything was said and done, but it does.


I kept this fan that is on the top side of the center divider. I took it out of the styrofoam and discarded the styrofoam. If I were to do it again I would have kept some sections of the the styrofoam for reinforcement of the center divider.


I removed the styrofoam from the defrost heating element, but left the element in place. This could easily be controlled by an external temperature controller for heating at a later date.

 I kept the evaporator in place as well.


I cut a hole to allow for the humidity controller to sit in the center divider. I used Black RTV around the edges of the humidity controller. I did the same for the zone thermometer as well. I kept the exciting LED lights hooked up in the cabinet. Both the top and bottom are wired into a 12v motion sensor switch, so they don’t stay on 24/7.


Originally I did not intend on putting a “real” humidification device in the unit. After scrolling through Amazon, I found this guy for $69. I really couldn’t pass on giving it a shot. I plan on test running dual zone humidification to see how it does. I have a feeling just running this one will be more than enough. Amazon lost the first one, so maybe I’ll wind up with two.
Part 2 to follow:


This is what I started with. It’s and edge star wine cooler I found on market place. The guy said it wouldn’t cool. Claimed he had an appliance repairman come out to evaluate the unit. He said that the compressor shit the bed. Turns out I know a guy who deals with heating and cooling on a regular basis. For the whopping price of $150 I loaded it up and took it home. The compressor worked fine, the lack of refrigerant in the system was an issue. It appeared a four legged animal nibbled on the service line of the compressor at some point.
I kept the compressor and evaporator hooked up, because for some reason my mind operates in the manner of “better to have and not need, than need and not have”. I also kept the defrost attached in case I ever decide to run heat in the unit.
It goes with out saying there’s probably a thousand different ways to go about this. If you haven’t noticed yet, I have the tendency to get hyper focused on a hobby once I get started.

I started by pulling the center divider out of the unit. It’s a perfect place to hide wiring and controls. I cut two vents on the bottom side of the center divider to allow air to move from the bottom section.

I spliced into the existing 110V incoming power and wired it up the the humidity controller. I then ran the 110v coming out of the controller to a 12V step down transformer. Then the outgoing 12V from the transformer to the terminal block for the fans and lights.


I added the UV strip lights with the intention of using the UV Lights ability to kill bacteria. I’m hoping this will keep any mold from being able to survive. They come on anytime the fans get a call from the humidity control. I also kept the factory temperature display in the top of the unit. I wasn’t sure if it would still operate properly when everything was said and done, but it does.

I kept this fan that is on the top side of the center divider. I took it out of the styrofoam and discarded the styrofoam. If I were to do it again I would have kept some sections of the the styrofoam for reinforcement of the center divider.

I removed the styrofoam from the defrost heating element, but left the element in place. This could easily be controlled by an external temperature controller for heating at a later date.


I cut a hole to allow for the humidity controller to sit in the center divider. I used Black RTV around the edges of the humidity controller. I did the same for the zone thermometer as well. I kept the exciting LED lights hooked up in the cabinet. Both the top and bottom are wired into a 12v motion sensor switch, so they don’t stay on 24/7.

Originally I did not intend on putting a “real” humidification device in the unit. After scrolling through Amazon, I found this guy for $69. I really couldn’t pass on giving it a shot. I plan on test running dual zone humidification to see how it does. I have a feeling just running this one will be more than enough. Amazon lost the first one, so maybe I’ll wind up with two.
Part 2 to follow:


